Kitchen Printer Setup
🎥 Video Guide
Click to view video Guide
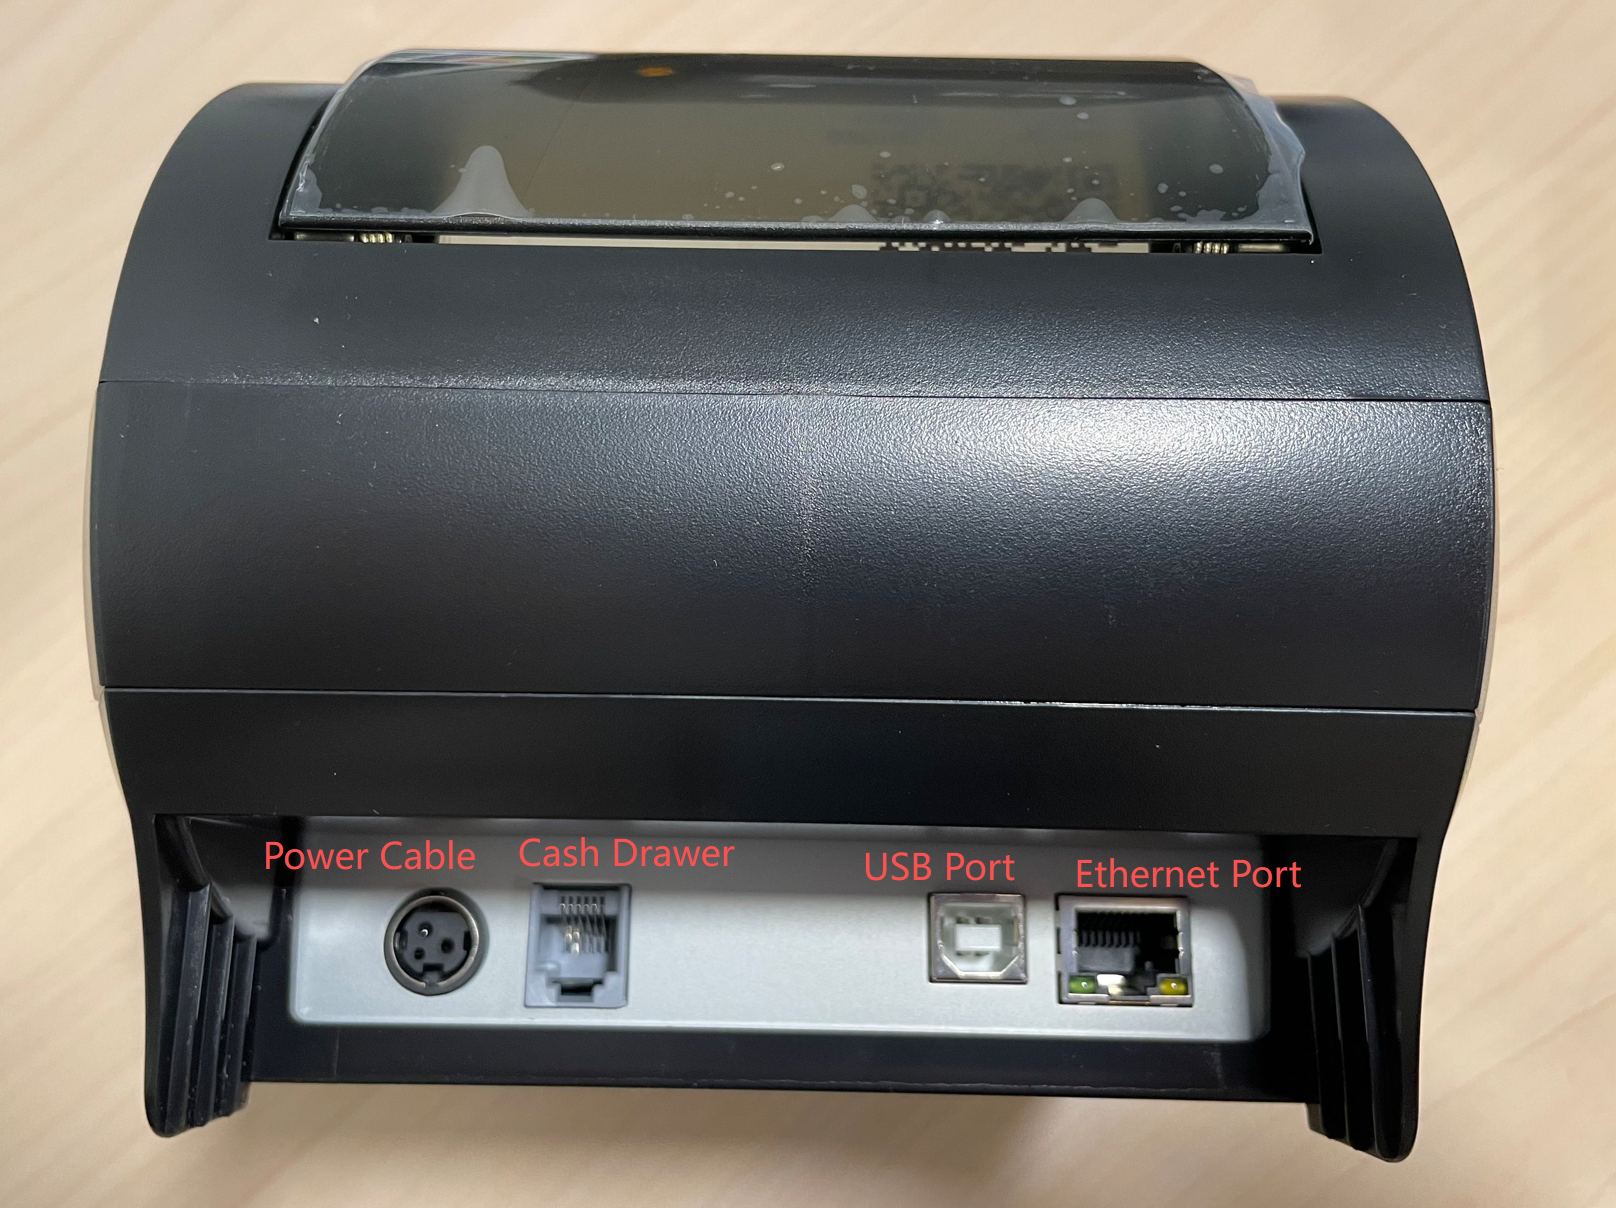
1. Connect the Power
- Check the ports on the back of the printer
- The round black port is the power port
- Connect the power cable and plug it into a wall outlet
2. Connect the Network
- The square port with a silver frame is the network (LAN) port
- Green and yellow indicator lights are located next to the port
- Connect an Ethernet cable to a router or network switch
3. Power On
- Locate the power switch on the front or side of the printer
- Turn on the printer
4. Handle Alert Beeping
- If the printer makes a continuous beeping sound after powering on
- This indicates Out of Paper
- Load receipt paper and the beeping will stop
5. POS Software Setup
- After hardware setup is complete
- Contact Beyond Menu Technical Support
- Support will add and configure the printer in the POS system
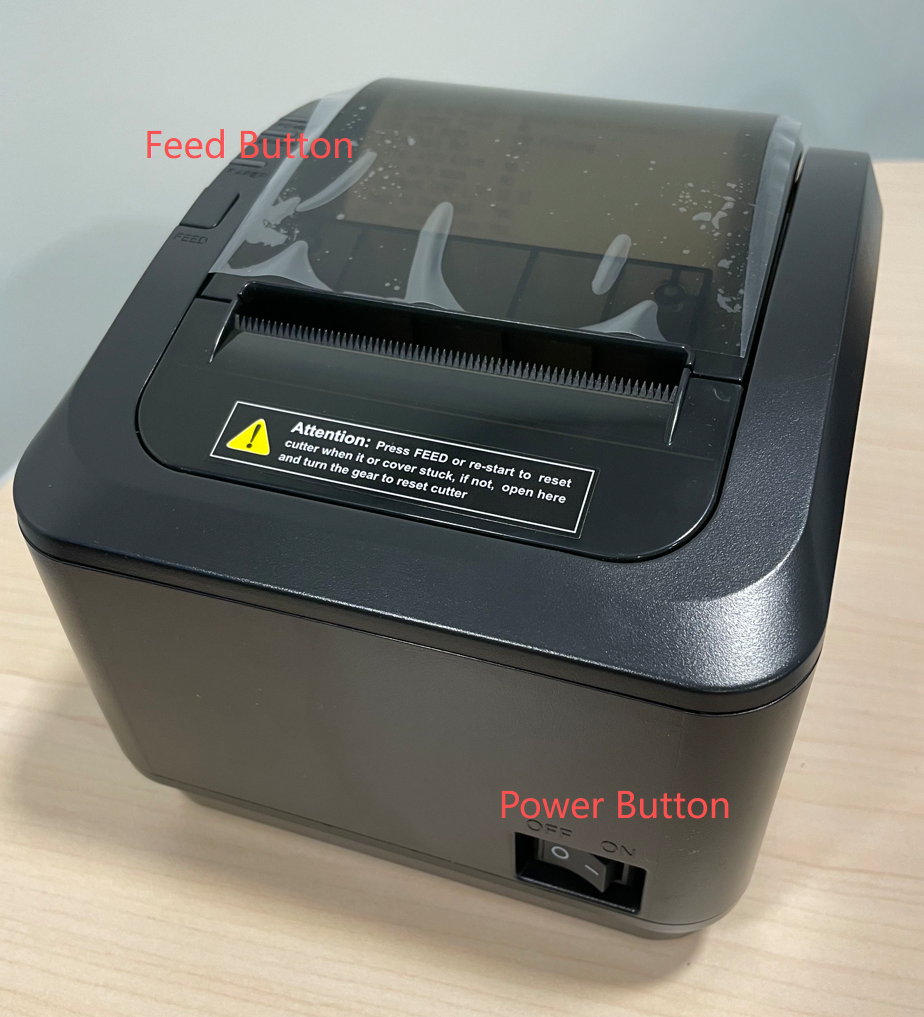
💡 Tips: How to Find the Printer IP Address
If you don’t know the printer’s IP address:
- Power off the printer
- Press and hold the Feed button
- Power on the printer while holding Feed
- Release the Feed button after about 2 seconds
- The printer will print a self-test page showing the IP address