Computer Setup & Connection Guide
🎥 Video Guide
Click to view video Guide
1. Unbox the Computer
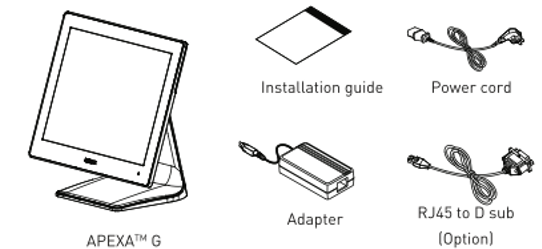
You should find:
- Computer unit
- Power cable
- Power adapter
2. Remove the Back Panel
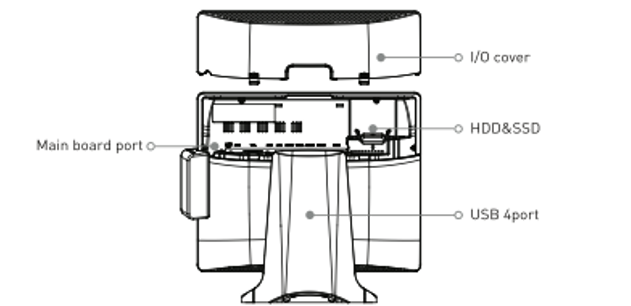
On the back of the computer, there are Push Sign labels on both sides.
Press and slide to remove the back panel.
3. Connect the Power
- Locate the round black power port in the center
- Connect the power adapter and plug it into a wall outlet
- The green light on the adapter indicates power is connected
4. Connect the Network
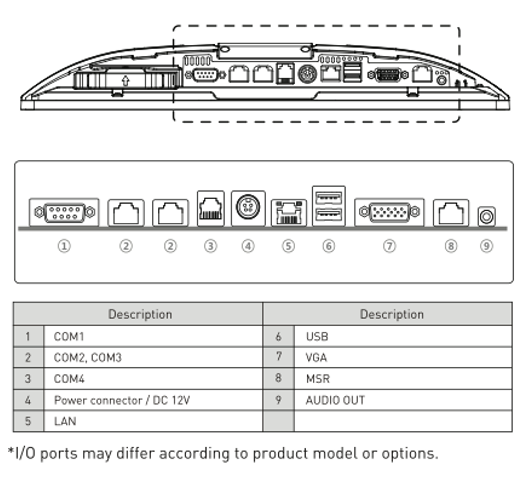
- The LAN (network) port is next to the power port, 5 LAN as in pciture
- Connect an Ethernet cable to a router or network switch
5. Cable Management (Optional)
Open the stand’s back cover using the two bottom clips
to hide cables and keep the setup clean.
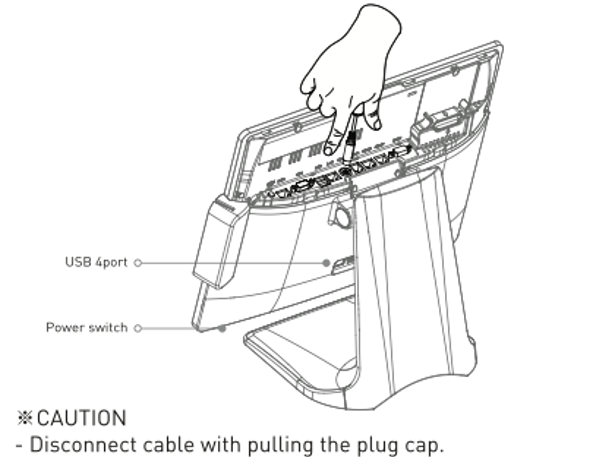
6. Power On
- Physical power button
- Located below the indicator light on the right side of the screen
- Press to turn on the computer
7. Software Setup
After startup:
- Open TeamViewer on the desktop
- Contact Beyond Menu Technical Support for remote setup